Hello, libGDX!
Creating a libGDX Project
Now that you have installed all the required tools, it's finally time to create your first libGDX project! libGDX provides a simple wizard tool to allow you to get started with a minimal project. This tool generates a Gradle powered scaffold that lets you run/deploy/debug from command line, or whatever IDE you like. In this blog, we'll be using IDEA/Android Studio IDE.
Click here to download the libGDX project setup tool. It's an executable JAR file. Double-click it to start the tool.
Note: you need to have the JRE installed in order to run Java applications. Please read our environment setup guide to install all required applications!
After double-clicking the setup tool, the application should open and display a window similar to the one below:

The setup tool provides some fields to fill. Information entered here determines how the resulting project will look like and behave. Let's look at the provided fields, what they mean and what can be entered:
- Name: The name of your game project.
- Package: Java package for your application. Usually a domain plus the project name. It should be unique for every project.
- Game class: The main game class. This will be used as the name of the starter class for your game. You can think of the starter class as the entry point of your game. This will typically be the name of the project (with no spaces) but that's not required.
- Destination: The destination of the project. This is where the project will be created at. If the specified directory doesn't exist, it will be created.
- Android SDK: Path to the Android SDK. If you installed it via Android Studio, the path will most likely look like C:\Users\YOUR_USERNAME\AppData\Local\Android\Sdk (in Windows). You can google ways to find out where the SDK is installed if you can't find it.
Sub Projects
libGDX is cross-platform but you can choose to support only a subset of the supported platforms, you don't have to support every platform. The sub projects section of the setup tool lets you choose the platform(s) that you want to support.
Extensions
Extensions are extra optional features that we can choose to add to our project.
Select the extensions you want included in your project.
The libGDX maintained extensions are shown on the main page.
Go ahead and fill the fields. Once you have filled the fields to your satisfaction, hit the Generate button.
This may take some time to complete and you may need to be connected to the internet for this to work. Once the setup tool finishes, the project should be created at the specified destination.
If you encounter problems please let us know in the comments or paste the error messages in google to get help.
Importing the libGDX Project
Now that we have created a libGDX project, we have to import it to an IDE in order to work with the project.
Here we're using IntelliJ IDEA but the instructions works similary for Android Studio.
If this is the first time you're importing a libGDX project, your computer must be connected to the internet in order to download the necessary files needed by libGDX
to function!
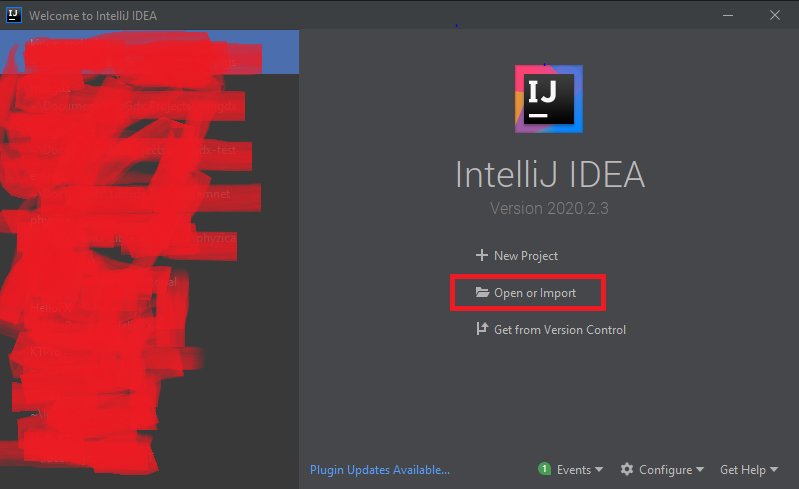
Open up IntelliJ IDEA. On the welcome window, you should see an option labeled Open or Import (check the image below).
Click it and a file chooser dialog should appear. Navigate to where the project is and click the project folder.
Wait for the IDE to download the required files (this may take sometime depending on your internet speed!).
If all goes well, you should something similar to the image below (click to expand):

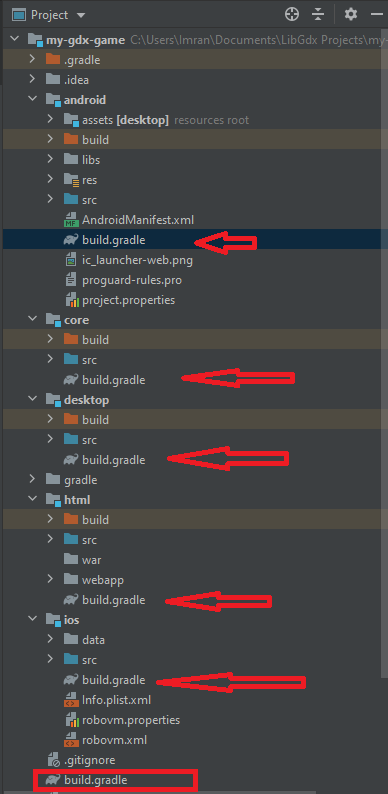
At the far left of the window is the Project View (you may need to expand it). As you can see, the setup tool created folders for every supported platform.
In our case, the supported platforms are android, desktop, html and ios (all platforms!). These folders are called modules.
The core module is where our platform-independent codes will go. Click here
to get detailed information about the project structure.
Gradle is the dependency management system used to pull 3rd party libraries into your project. Read more here.
Running the libGDX project
In this section we will discuss how to run the desktop and android modules. There are resources available online that covers how to run it on the other platforms.
Find the Run/Debug configurations dialog, located at the top-right side of the IDE (check the image below). Click it.
A dialog appears, click Edit Configurations....

You should see a window that looks like the one below. Click the plus (+) icon at the top-left side of the window to create a new configuration.
On the dialog that appears, choose Application.
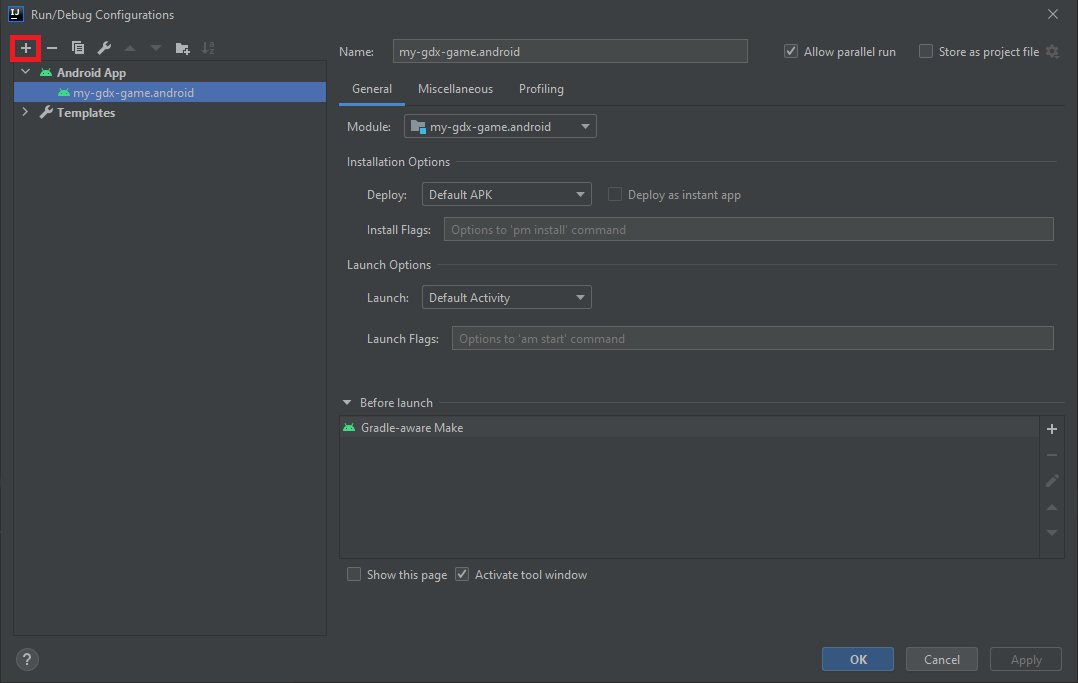
Clicking Application shows a new window with fields to fill (see the image below). This is where we setup a desktop configuration to run our project. Fill the fields accordingly using the information below:
- Name: The name of the configuration. Enter desktop here.
- Main class: The executable class to run (a class with a main() method). Click the three dots icon and select DesktopLauncher.
- Working directory: The location where the game assets can be found. Click the folder icon and naviagte to PROJECT_NAME > android > assets, select it.
- Use classpath of module: Click it and select PROJECT_NAME.desktop
- Leave every other option as is!
After filling the fields, the window should look similar to the image below. Click Ok to save the new configuration.


It's finally time to run the project. Locate the run icon (a green play icon at the top-right corner of the IDE) and click.
Wait patiently for the IDE to do its magic. If all goes well, you should see a new window displayed, having a red background and a badlogic logo.
Congratulations! You just ran your first libGDX project.
If you are seeing errors, please tell us in the comments!
Running on an Android device
So far, so good! Our project runs on a desktop. But that's just one of the supported platforms, what about the rest!?
In this section, we will discuss how to run the project on an Android device. There are resources available online that covers how to run it on the other platforms, just google it!
In practice, you could run the project on an emulator instead of a physical device but we strongly advice against this, an emulator is usually too slow to run a game!.
Luckily, the IDE already created a run configuration for Android. All we have to do now is connect an Android device and hit the run button.
Well, not quite, we have to do some setups first:
- To pair your Android device with your computer, you have to enable USB Debugging on the android device, which can be a little obscure in later versions. Google how to enable it for your specific Android version.
- In some OS (like Windows), you may need to install the Google USB Driver first. If the IDE can't see your device then you probably need to install it. Click here to install it.
If all goes well, after connecting your device with a USB cable, you should see your device name selected on a dialog button close to the Run/Debug configurations dialog.
If it isn't selected, click the dialog and select it. Next, make sure the android run configuration is selected on the Run/Debug Configurations dialog if it isn't (see the image below).
Now click the run button to run the project on your Android device! The build process may take a long time to complete for the first run, wait.

Making the Project Compatible with Java 8
As of the time of this writing, the minimum supported Java version is version 8 (1.8). Oddly, the setup tool doesn't reflect this in the project files (yet) so we have to make those changes ourselves.
Fortunately, it is very easy to change, so let's get to it!
We're going to be editing files used by the build tool (Gradle). Every module of a libGDX project has a file named build.gradle.
These files tells gradle how to build each module for their target platform. The project itself also have its own build.gradle file which is used to make project-wide changes.
Anytime you make changes to any of these files, the IDE will require you to sync the project in order to effect your changes.
Check the image below to see an expanded view of the project and the build files for each module.
The one highlihted with a rectangular box is the project-level build.gradle file.
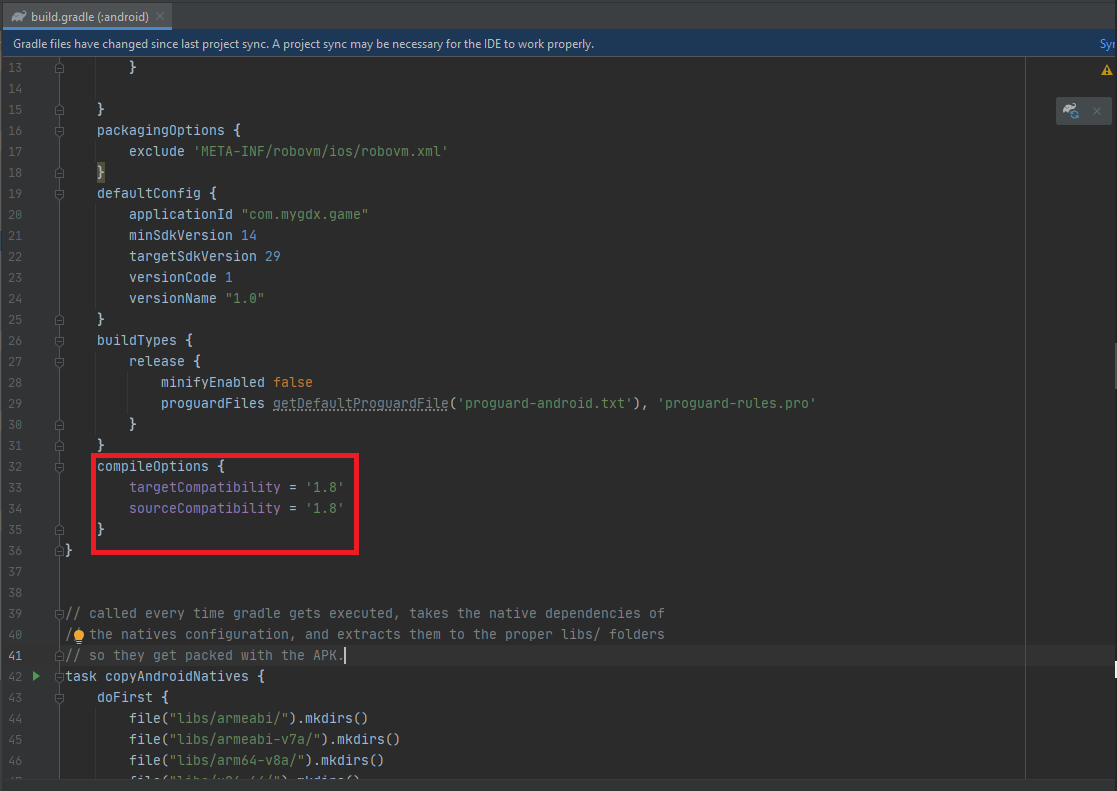
Let's start with the android module. Using the Project View, expand the android module and open the build.gradle file.
Add the following snippets below buildTypes:
    compileOptions {
        targetCompatibility = '1.8'
        sourceCompatibility = '1.8'
    }
After making the change, the contents of the file should look like the image below. The IDE will prompt you to sync, don't do it now, we still have some changes to make!
Now let's fix the other gradle files. Open all the other build.gradle files (except the project-level one).
In every build.gradle file opened, anywhere you see 1.7, replace it with 1.8.
Check the image below to see how the gradle file of the core module looks like after making the change:

After making all the changes, it's now time to sync the build files with the project. You should see a message prompt above the editor in the IDE. Click Sync Now to sync the project. Wait for the sync to complete and the message prompt should dissapear afterwards.
Wheew! That was alot to take in but it will be worth it in the long run. These settings prepares us for the future tutorials and this tutorial also serves as a reference. You can always refer to this tutorial if you ever have issues with setting up your libGDX project. Please use the comments to request for assistance if you ever get stuck or something just ain't working.
Got this error while trying to run the game. I've followed up till the part where the game was supposed to be run.
ReplyDeleteFAILURE: Build failed with an exception.
* Where:
Initialization script 'C:\Users\HP\AppData\Local\Temp\DesktopLauncher_main__.gradle' line: 18
* What went wrong:
A problem occurred configuring project ':desktop'.
> Could not create task ':desktop:DesktopLauncher.main()'.
> Unnecessarily replacing a task that does not exist is not supported. Use create() or register() directly instead. You attempted to replace a task named 'DesktopLauncher.main()', but there is no existing task with that name.
What IDE are you using?
DeleteAndroid Studio
DeleteWhat version of Android Studio are you using?
DeleteV 3.6.3
DeleteThis comment has been removed by the author.
DeleteThis is actually a gradle error. If the IDE prompt you to upgrade gradle, please do
DeleteTheres's no option to upgrade gradle, and I'm using gradle 7.0
DeleteI tried running with stacktrace and got two errors:
1. Caused by: org.gradle.api.internal.tasks.DefaultTaskContainer$TaskCreationException: Could not create task ':desktop:DesktopLauncher.main()'.
2. Caused by: java.lang.IllegalStateException: Unnecessarily replacing a task that does not exist is not supported. Use create() or register() directly instead. You attempted to replace a task named 'DesktopLauncher.main()', but there is no existing task with that name.
It looks like the task doesn't exist. Try creating another project and reimport let's see. It could be an error in the setup. You can also try clearing the gradle caches too.
DeleteHello. That is a bug with some versions of IntelliJ and Android Studio. Please update your IDE
ReplyDelete